
Last weekend we improved our water system in a major way, increasing our water security on the “homestead” and making our lives easier in the process.
We’ve known since early last winter that a failing valve under the winter water tank needed to be addressed (see Dodging a Bullet). We planned to insert a new ball valve into the system when we switched from the winter water tank to the summer water tank (see Fresh Water: Collecting and Conserving a Precious Resource).
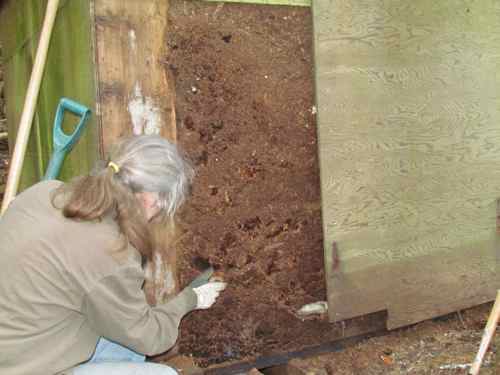
Packed duff insulation inside the winter water tank housing (Photo: Mark A. Zeiger).
I imagined installing the new valve under the house, but that soon proved to be impractical. Instead, we had to go up to the winter water tank and see what could be done.
The box that contains the failing valve proved too small to house a ball valve. We discovered, too, that the old valve is plumbed right into the water tank, which made switching one for the other a problem.
We pulled off a lower panel of the tank house wall to see if we could look inside. We found it thickly packed with forest duff. Cutting through this, we found a good, solid deck between us and the plumbing in the box below.
We began to cast about for the water line. We have two maps drawn by the original owner, but they gave us only a vague idea of where to look. I dug a trench in front of the tank housing, hoping to bisect the line.
Finally, we dug under the housing, along the side of the box, until we found an adequate length of the line, fairly straight, where we could install the ball valve. This would put it under the housing, close to the box, protected by the hinged flap that had covered the box.

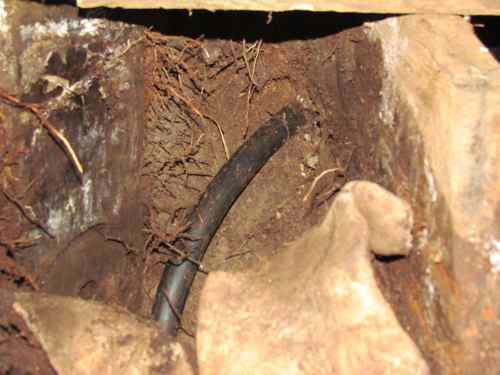
The valve box with exposed water line on the left side (Photo: Mark A. Zeiger).
A good place to insert a new valve (Photo: Mark A. Zeiger).
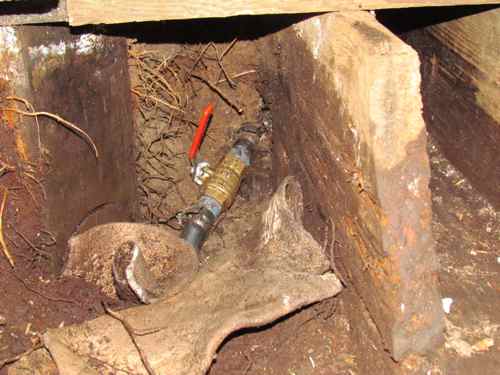
The new valve, before adding the plastic backing (Photo: Mark A. Zeiger).
We cut the line, installed the valve, and slid half a plastic jug behind it to keep roots and dirt from fouling it. We packed insulation in around it, and adjusted the hinged flap (the hinges needed to be replaced anyway). We then filled in the holes, and our water system’s set. We opened the old valve and packed its box with insulation. Its seal failed, but it shouldn’t cause any problems in the future, as it’s just part of the water line now.
I intend to add some hardware and line so that we can hook the flap open and get under it. From now on, opening and closing the valve will be simple: an easy reach inside, a quick flip of the valve’s lever, and it’s done. No more laying flat on the forest floor, reaching in to the shoulder to twist a faucet wheel with outstretched fingertips!